
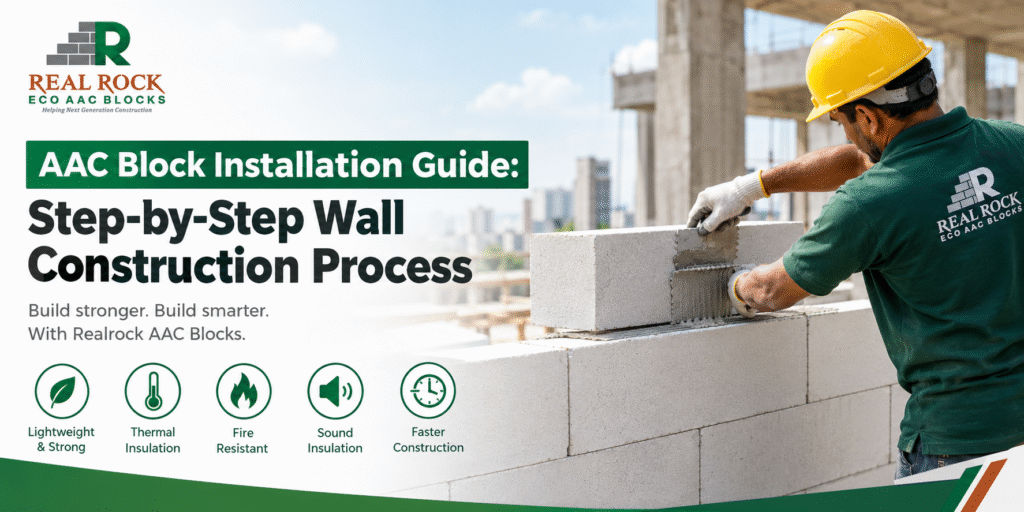
AAC Block Installation is an important part of modern construction, offering builders, contractors, architects, and homeowners a faster and more efficient alternative to conventional brick masonry. Autoclaved Aerated Concrete (AAC) blocks are lightweight, durable building materials known for their thermal insulation, fire resistance, sound insulation, and ease of installation.
However, the performance of AAC blocks depends not only on their quality but also on following the correct installation procedure. Proper surface preparation, accurate block alignment, suitable adhesive application, appropriate joint spacing, and careful finishing are essential for constructing strong, stable, and long-lasting walls.
Whether you are constructing a residential home, commercial building, apartment complex, or industrial facility, understanding the AAC block installation process can help improve construction quality while reducing material wastage and unnecessary labour.
At Realrock AAC Blocks, we believe that quality construction begins with quality building materials and the right installation practices. This comprehensive guide explains how to install AAC blocks step by step, highlights common mistakes to avoid, and shares practical recommendations for achieving better masonry results.
What Is AAC Block Installation?
AAC Block Installation refers to the process of constructing walls using Autoclaved Aerated Concrete blocks, a lightweight precast building material manufactured through an autoclaving process.
AAC blocks are produced using materials such as cement, lime, silica-rich materials, water, and an aerating agent. The manufacturing process creates numerous microscopic air pockets within the blocks, giving them their characteristic lightweight structure.
Unlike conventional red bricks, AAC blocks are generally larger in size and lighter in weight. This allows masons to cover larger wall areas using fewer individual units.
AAC block masonry typically involves:
- Preparing and marking the wall layout.
- Checking the foundation or supporting surface.
- Applying the appropriate bedding mortar.
- Laying AAC blocks in a staggered pattern.
- Maintaining horizontal and vertical alignment.
- Providing reinforcement and structural connections where specified.
- Installing lintels above openings.
- Completing plastering and surface finishing.
When executed correctly, AAC block construction can provide an efficient walling solution for residential and commercial projects.
Why Choose AAC Blocks for Wall Construction?
Before understanding the installation procedure, it is useful to know why AAC blocks are increasingly preferred in modern Indian construction.
1. Lightweight Construction
AAC blocks are significantly lighter than conventional clay bricks. Their lower dead load can reduce the overall weight transferred to structural members, subject to engineering design.
2. Thermal Insulation
The air pockets inside AAC blocks help reduce heat transfer. This can contribute to more comfortable indoor temperatures and potentially lower cooling requirements.
3. Fire Resistance
AAC blocks offer excellent fire-resistant properties because of their mineral-based composition. Actual fire performance depends on block thickness, density, and tested assembly specifications.
4. Faster Construction
Larger block dimensions mean fewer masonry units and joints are required to construct the same wall area. This can improve construction speed when the work is properly planned.
5. Better Material Efficiency
AAC blocks can be cut and shaped using suitable tools, making it easier to accommodate electrical conduits, plumbing provisions, and specific wall dimensions.
6. Sound Insulation
AAC masonry can help reduce sound transmission between spaces. The actual acoustic performance depends on wall thickness, density, joints, and the complete wall assembly.
For builders looking for reliable AAC block solutions, choosing an experienced manufacturer is equally important. Explore Realrock AAC Blocks to learn more about AAC block solutions for modern construction requirements.
Step-by-Step AAC Block Installation Process
The following steps explain how AAC blocks should generally be installed to achieve accurate alignment, proper bonding, and quality wall construction.
Step 1: Prepare the Construction Site and Wall Layout
The first step in AAC Block Installation is preparing the construction area.
Before starting masonry, ensure that the foundation, slab, or supporting surface is ready for wall construction. Remove loose materials, dust, oil, debris, and other contaminants that may interfere with bonding.
Next, mark the wall positions according to the approved architectural and structural drawings.
Important preparation activities include:
- Identify the exact wall dimensions and thickness.
- Mark the wall alignment using a chalk line.
- Locate door and window openings.
- Verify the position of columns and beams.
- Check the floor level and supporting surface.
- Confirm the locations of electrical and plumbing provisions.
Use measuring tapes, chalk lines, and laser levels wherever required to maintain dimensional accuracy.
Pro tip: Double-check the wall layout before placing the first block. Small alignment errors at the beginning can become larger problems as the wall progresses.
Step 2: Select the Right AAC Blocks and Materials
Selecting suitable blocks is essential for successful AAC block wall construction.
Check the blocks before installation to ensure they are appropriate for the project’s specifications.
Consider the following factors:
- Block dimensions and thickness.
- Dry density and compressive strength.
- Dimensional accuracy.
- Surface condition.
- Visible cracks or excessive damage.
- Manufacturer’s product specifications.
Blocks should be stored on a firm, level surface and protected against excessive moisture and physical damage.
Avoid using heavily damaged blocks in critical wall sections. Minor cutting and shaping should be performed using suitable AAC cutting tools.
In addition to blocks, arrange the necessary installation materials, including AAC block adhesive, conventional mortar for the initial leveling course, measuring tools, rubber mallets, spirit levels, and cutting equipment.
For project-specific material requirements, work with a dependable supplier. Builders and contractors can explore Realrock AAC Blocks – AAC Block Manufacturers in India when evaluating AAC block solutions for their construction projects.
Step 3: Prepare the Base Surface
A properly prepared base provides the foundation for accurate wall construction.
Check the slab or supporting surface for level differences. Remove loose concrete, dust, and other unwanted materials before laying the first course.
Where specified in the design, provide a suitable damp-proof course (DPC) or waterproofing treatment to prevent moisture from migrating into the masonry.
If the supporting surface is uneven, correct the level using an appropriate conventional cement mortar bed.
The first course is particularly important because every subsequent course depends on its alignment.
Ensure that:
- The base is clean and stable.
- The wall marking is accurate.
- The first-course mortar provides uniform support.
- The wall starts at the correct elevation.
- Moisture protection is provided where required.
Do not use AAC block adhesive to compensate for major unevenness in the base. Thin-bed adhesive is intended for properly aligned masonry, not for correcting substantial level differences.
Consider reading more about AAC Blocks Price in India 2026
Step 4: Prepare AAC Block Adhesive
One of the most important aspects of AAC Block Installation is selecting and applying the correct bonding material.
AAC blocks are generally installed using specially formulated thin-bed adhesive or AAC block jointing mortar.
Unlike conventional brick masonry mortar, AAC block adhesive is designed to create strong bonding with relatively thin joints.
The typical application thickness is approximately 3–5 mm, depending on the adhesive manufacturer’s instructions.
To prepare the adhesive:
- Take a clean mixing container.
- Add the required quantity of clean water.
- Gradually add the dry AAC block adhesive.
- Mix thoroughly using a suitable mechanical mixer or mixing tool.
- Allow the mixture to rest if instructed by the manufacturer.
- Remix before application.
Always follow the manufacturer’s recommended water-to-powder ratio and usable working time.
Avoid adding excessive water because it can affect the consistency and bonding performance of the adhesive.
Why is AAC block adhesive preferred?
- Provides uniform and thin joints.
- Reduces mortar consumption.
- Improves masonry productivity.
- Helps achieve consistent bonding.
- Minimises thick mortar joints and associated thermal bridging.
Step 5: Lay the First Course of AAC Blocks
The first course is the most critical stage of the AAC block laying procedure.
Begin by applying an appropriate conventional leveling mortar bed over the prepared base.
Place the first block at a corner or designated starting point. Continue laying blocks along the marked wall alignment.
During installation:
- Position each block carefully.
- Check the horizontal level.
- Verify vertical alignment.
- Maintain the required wall thickness.
- Adjust blocks using a rubber mallet.
- Remove excess mortar from joints.
Work progressively from one corner to another.
Use a spirit level and mason’s line to ensure that the entire first course remains straight and level.
If the first course is incorrectly aligned, correcting the error in subsequent courses becomes difficult and may affect the quality of the completed wall.
Allow the first course to gain sufficient stability before continuing, as specified by the mortar or project requirements.
Step 6: Install Subsequent Courses Using Thin-Bed Adhesive
Once the first course is properly aligned and stable, begin installing the remaining AAC blocks using the recommended thin-bed adhesive.
Apply adhesive uniformly to the horizontal bed joint and vertical head joint using a suitable notched trowel.
Place the next block firmly against the previous block to establish proper contact.
The blocks should be arranged in a staggered or running bond pattern rather than placing vertical joints directly above one another.
A typical recommended overlap is at least 100 mm or one-third of the block length, whichever is greater, subject to the manufacturer’s installation instructions and project specifications.
Important installation practices include:
- Clean the top surface before applying adhesive.
- Apply adhesive evenly.
- Maintain consistent joint thickness.
- Avoid excessive gaps between blocks.
- Remove excess adhesive before it hardens.
- Check alignment after placing each block.
Use a rubber mallet for minor adjustments instead of striking the blocks with a heavy hammer.
Continue checking the wall’s horizontal and vertical alignment throughout the masonry process.
Step 7: Maintain Proper Alignment and Provide Reinforcement
Proper alignment and reinforcement are essential for maintaining the stability and durability of AAC block walls.
Use the following tools during installation:
- Spirit level.
- Plumb bob.
- Mason’s line.
- Measuring tape.
- Straightedge.
- Rubber mallet.
Check the wall frequently to identify deviations before they become difficult to correct.
Reinforcement should be provided wherever required by the approved structural design and manufacturer’s recommendations.
Depending on the wall configuration, reinforcement measures may include:
Bed Joint Reinforcement: Reinforcement mesh may be incorporated into selected horizontal joints to help control cracking.
Column Connections: AAC masonry adjoining RCC columns may require suitable wall ties or mechanical connections.
Beam Connections: Non-load-bearing walls should have an appropriately detailed top connection that accommodates expected structural movement and deflection.
Control Joints: Long walls or walls with significant changes in geometry may require movement joints at locations specified by the designer.
The exact reinforcement arrangement, spacing, anchorage, and joint detailing should always be determined by a qualified structural professional.
Step 8: Construct Door and Window Openings
Door and window openings require special attention during AAC block wall construction.
Mark the opening dimensions according to the approved architectural drawings before laying the surrounding blocks.
Maintain accurate measurements for:
- Opening width.
- Opening height.
- Sill level.
- Lintel level.
- Frame installation clearance.
Use appropriately sized AAC blocks around openings and avoid unnecessary small or irregular pieces.
A properly designed lintel should be provided above doors and windows to transfer the loads acting above the opening to the supporting wall sections.
Depending on the project, lintels may be reinforced concrete, engineered precast components, or other approved systems.
Ensure that the lintel has the required bearing length and reinforcement as specified by the structural design.
Never assume that an ordinary AAC block can independently replace a structural lintel.
Step 9: Complete Wall Construction and Top Connections
Continue laying AAC blocks until the required wall height is achieved.
At the top of non-load-bearing partition walls, the connection with the RCC beam or slab must be detailed carefully.
A suitable movement gap or deflection head detail may be necessary to accommodate structural movement.
Use the specified compressible filler, sealant, or other approved connection system.
Do not tightly wedge the final course against a deflecting beam unless the structural design specifically requires it.
Also inspect:
- Overall wall height.
- Vertical alignment.
- Horizontal joint consistency.
- Connections to adjoining walls.
- Reinforcement placement.
- Door and window dimensions.
Allow the masonry to stabilise before carrying out subsequent construction activities.
Step 10: Electrical and Plumbing Work
AAC blocks are relatively easy to cut and chase using suitable tools, making electrical and plumbing installations more convenient.
However, chasing should be carefully planned to avoid compromising the wall’s integrity.
Common services installed within AAC walls include:
- Electrical conduits.
- Switch boxes.
- Plumbing pipes.
- Communication cables.
- Other building services.
Use suitable AAC cutting or chasing equipment rather than heavy demolition tools.
Avoid deep or excessive horizontal chases, especially in thin partition walls.
Coordinate service locations with the electrical and plumbing drawings before starting the work.
After installing the services, fill the chases using compatible repair materials and ensure that the surface is properly prepared for finishing.
Step 11: Plastering and Surface Finishing
Once the masonry and service installations are complete, prepare the walls for plastering.
Remove loose adhesive, dust, and other unwanted materials from the surface.
Check for uneven areas and fill minor defects using suitable repair materials.
AAC blocks have a different surface absorption behaviour from conventional clay bricks. Therefore, plastering materials and preparation methods should be selected specifically for AAC masonry.
Recommended practices include:
- Use compatible plastering materials.
- Apply a suitable bonding treatment or primer where specified.
- Install reinforcement mesh at RCC-to-AAC junctions where required.
- Follow the recommended plaster thickness.
- Maintain proper curing for cement-based plaster.
- Apply suitable waterproofing and exterior finishing systems.
The final surface should be smooth, uniform, and free from visible cracks or loose plaster.
A properly finished AAC wall can provide a clean surface suitable for painting, tiles, or other decorative treatments.
Common Mistakes to Avoid During AAC Block Installation
Even high-quality AAC blocks may deliver poor results if installation practices are incorrect.
Here are some common mistakes builders and contractors should avoid:
| Common mistake | How to avoid it |
|---|---|
| Using unsuitable mortar | Use adhesive recommended for AAC blocks. |
| Uneven first course | Check base levels and alignment carefully. |
| Thick adhesive joints | Maintain the manufacturer’s recommended joint thickness. |
| Incorrect block alignment | Use a spirit level and plumb bob regularly. |
| No staggered bonding | Maintain the specified minimum block overlap. |
| Ignoring wall connections | Provide designed ties and movement details. |
| Improper lintel installation | Follow structural drawings and lintel specifications. |
| Excessive wall chasing | Plan electrical and plumbing services in advance. |
| Poor plaster preparation | Use compatible surface preparation and plastering systems. |
| Improper moisture protection | Follow suitable DPC and waterproofing details. |
Avoiding these mistakes can improve wall quality, reduce rework, and support long-term building performance.
Quality Checklist for AAC Block Wall Construction
Before approving completed AAC masonry, contractors and site engineers should inspect the following:
- Blocks comply with approved project specifications.
- The supporting surface is level and stable.
- The first course is correctly aligned.
- Adhesive is suitable for AAC masonry.
- Bed and head joints are properly filled.
- Required block overlap is maintained.
- Wall alignment and plumb are checked.
- Reinforcement and wall ties are installed as specified.
- Door and window openings are dimensionally accurate.
- Lintels are installed according to structural details.
- RCC junctions and top connections are properly detailed.
- Electrical and plumbing chases are appropriately repaired.
- The wall surface is ready for the selected finishing system.
Following a consistent quality checklist helps maintain construction standards across residential, commercial, and industrial projects.
Why Choose Realrock AAC Blocks for Your Construction Project?
Selecting the right AAC block manufacturer is an important decision for every construction project.
The quality and consistency of the blocks can influence masonry productivity, adhesive consumption, cutting requirements, and the final wall finish.
Realrock AAC Blocks focuses on providing AAC block solutions for modern construction requirements.
Whether you are a builder, contractor, architect, developer, or individual planning a residential project, selecting a dependable AAC block supplier can help you make more informed material decisions.
When evaluating AAC blocks, consider:
- Product dimensions and dimensional consistency.
- Compressive strength.
- Dry density.
- Thermal insulation characteristics.
- Product quality documentation.
- Availability and delivery requirements.
- Technical support and installation guidance.
Visit the Realrock AAC official website to explore the company’s AAC block solutions.
If you are searching for reliable AAC block manufacturers in India, Realrock AAC is a brand worth exploring for your upcoming construction requirements.
Frequently Asked Questions About AAC Block Installation
1. What is the correct procedure for AAC Block Installation?
AAC Block Installation generally involves preparing the base, marking the wall layout, laying the first course with leveling mortar, applying thin-bed AAC adhesive, installing blocks in a staggered pattern, providing necessary reinforcement and connections, and completing plastering and finishing.
2. Which adhesive is best for AAC block installation?
A specially formulated AAC block jointing mortar or thin-bed adhesive is generally recommended. It provides suitable bonding with relatively thin joints, typically around 3–5 mm, depending on the manufacturer’s specifications.
3. What is the recommended thickness of AAC block adhesive?
The typical thin-bed adhesive thickness is approximately 3–5 mm. However, the exact thickness should be based on the adhesive manufacturer’s technical instructions.
4. Can AAC blocks be installed using normal cement mortar?
Conventional cement mortar can be used in certain applications, particularly for the initial leveling course. However, specially formulated AAC block adhesive is generally preferred for subsequent courses because it is designed for thin, uniform joints.
5. How much time does AAC block wall construction take?
The time required depends on wall dimensions, site conditions, workforce availability, block sizes, and installation methods. Since AAC blocks cover larger wall areas per unit, masonry can often progress faster than conventional brickwork.
6. Are AAC blocks suitable for external walls?
Yes. AAC blocks can be used for external walls when the block thickness, structural detailing, weather protection, waterproofing, and exterior finishing are appropriately designed.
7. Do AAC block walls require plastering?
AAC walls may require plastering or another approved finishing system depending on the application. External walls need suitable weather-resistant protection, while internal walls can use compatible plaster, putty, or other approved finishes.
8. How can cracks in AAC block walls be prevented?
Cracks can be minimised through proper base preparation, correct adhesive application, accurate block alignment, adequate reinforcement at critical junctions, suitable movement joints, and compatible plastering practices.
9. Are AAC blocks suitable for residential construction in India?
Yes. AAC blocks are widely used in residential construction in India, including independent houses, apartments, and other building projects. Their lightweight properties and thermal insulation characteristics make them an attractive alternative for many walling applications.
10. How do I choose a reliable AAC block manufacturer in India?
Evaluate manufacturers based on product specifications, compressive strength, dimensional accuracy, quality documentation, consistency, supply capacity, and technical support. Always request relevant product test reports and verify that the blocks meet the requirements of your project.
Conclusion
Successful AAC Block Installation requires more than simply placing blocks one above another. Every stage, from site preparation and adhesive mixing to block alignment, reinforcement, lintel installation, and plastering, contributes to the quality and performance of the finished wall.
By following the correct AAC block installation process, builders and contractors can improve construction efficiency, reduce unnecessary material wastage, and achieve better-quality masonry.
Choosing high-quality building materials is equally important. With the right product selection and professional installation practices, AAC blocks can offer an effective walling solution for modern residential and commercial construction.
If you are planning your next construction project, explore Realrock AAC Blocks and discover suitable AAC block solutions for your building requirements.
Build smarter. Build stronger. Build with Realrock AAC Blocks.